Difference between revisions of "Kalpavriksha"
| Line 19: | Line 19: | ||
<br>[[#top|Back to top]]<br/> | <br>[[#top|Back to top]]<br/> | ||
| + | =Installation of 16.04 Ubuntu alongside windows versions= | ||
| + | Please refer to [karnatakaeducation.org.in/KOER/index.php/ಉಬುಂಟು16.04 Ubuntu 16.04] page to know about how to get custom DVD and how to install with windows. | ||
=[https://drive.google.com/file/d/0B3IdALBE0y2VbjlvNi1seUJlWkE/view?usp=sharing Installing Ubuntu 14.04 alongside windows 8/8.1 or windows 10 - In Legacy mode]= | =[https://drive.google.com/file/d/0B3IdALBE0y2VbjlvNi1seUJlWkE/view?usp=sharing Installing Ubuntu 14.04 alongside windows 8/8.1 or windows 10 - In Legacy mode]= | ||
| Line 26: | Line 28: | ||
<br>[[#top|Back to top]]<br/> | <br>[[#top|Back to top]]<br/> | ||
| − | |||
| − | |||
=Installing Ubuntu 14.04 alongside windows 8/8.1 or windows 10 - In UEFI mode= | =Installing Ubuntu 14.04 alongside windows 8/8.1 or windows 10 - In UEFI mode= | ||
Revision as of 09:54, 23 February 2017
NOTE:
Before following these below steps, take a backup of your existing data.
- Go to Places=>Home Folder
- In that select all the folders/files and copy to external devices(Like Pend drive, External hard disk).
create separate partition in Windows for Ubuntu installation
Go through the link for making seperate partition for ubuntu click here
Simple Ubuntu Installation
Simple Ubuntu Installation Click Here
Installing Ubuntu 14.04 (Kalpavriksha) along side windows 7 or windows XP
Installing Ubuntu 14.04 (Kalpavriksha) along side windows 7 or windows XP CLick here
Installation of 16.04 Ubuntu alongside windows versions
Please refer to [karnatakaeducation.org.in/KOER/index.php/ಉಬುಂಟು16.04 Ubuntu 16.04] page to know about how to get custom DVD and how to install with windows.
Installing Ubuntu 14.04 alongside windows 8/8.1 or windows 10 - In Legacy mode
Installing Ubuntu 14.04 alongside windows 8 - In Legacy mode Click Here
Using this Legacy mode, you will install Ubuntu in separate selected partition and will prefore this legacy method installation with windows 8 or 10.
Installing Ubuntu 14.04 alongside windows 8/8.1 or windows 10 - In UEFI mode
Customized Kalpavriksha will not support UEFI mode installation, so first you need to find out whether your computer is 32bit or 64bit then you need to download edubuntu from internet (Click here), make dvd and use it for installation.
After this installation you need to install all application.
Installing Ubuntu 14.04 alongside windows 8/8.1 or windows 10
Upgrading Ubuntu from one version to newest version
Upgrading Ubuntu from one version to newes version Example : 12.04 to 14.04 Click here
Installing Ubuntu alongside windows by using Something else (Separate partition)
Installing Ubuntu alongside in separate partition Click here
Video on installation
| Kannada | Telugu |
|---|
Download video
For watching and downloading this video on youtube Click here
General Problems and Steps for after installing ubuntu 14.04
Repairing Grub/Repairing Ubuntu booting Problem(Grub)
Boot-Repair is a simple tool to repair frequent boot issues you may encounter in Ubuntu like when you can't boot Ubuntu after installing Windows or another Linux distribution, or when you can't boot Windows after installing Ubuntu, or when GRUB is not displayed anymore, some upgrade breaks GRUB, etc.
1. If you are able to login in ubuntu, Follow the below steps:
- Login in to ubuntu Operating System
- goto to application==>>System tools==>>Administration==>>Boot repair
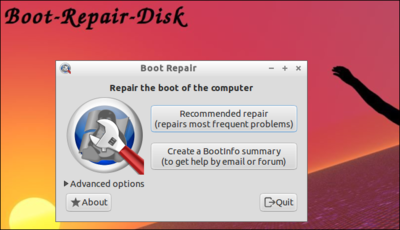
- Once the above window open, click on Recommended repair.
- Now, It will start to repaireing your groub(will take some minute to repair)
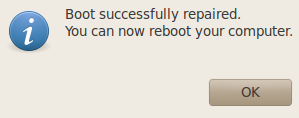
- Restart your computer after using the Boot Repair tool.
Back to top
Adding new user account in ubuntu 14.04
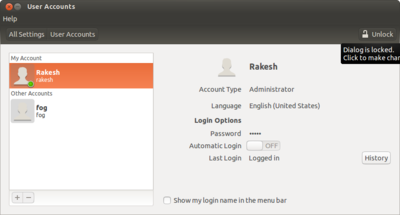
- Open system settings (Applications==>>System tools==>>System settings)
- click on User accounts.
- Click on Unlock button and put a login ubuntu password
- Click on Plus(+)symbol and fill the your name and new user account name.
- click Add.
- If you want the new user account in Kannada interface select new account you have created and click on langauage, select language kannada.
- Once you restart your computer, you will able to see two user accounts, select and login.
How to add languages in ibus in Ubuntu 14.04
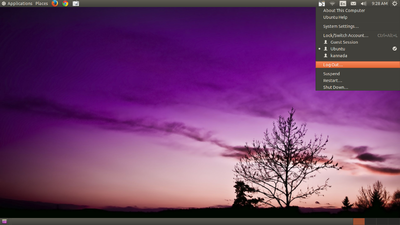
- Logout from the screen.
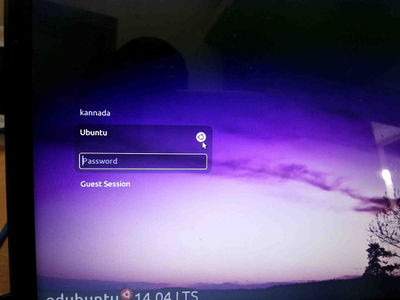
- from login screen Select Ubuntu like below screen.
- Again login to Ubuntu user by using your ubuntu password.
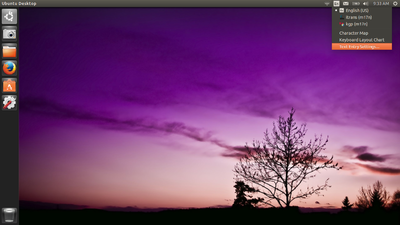
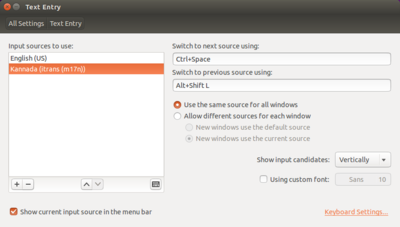
- On the top right side of the desktop, click on En icon(on top of the rightside screen) and goto text entry setting.
- In the text entry window, select Kannada (KaGaPa Phonetic) and click on – (Minus)symbol.
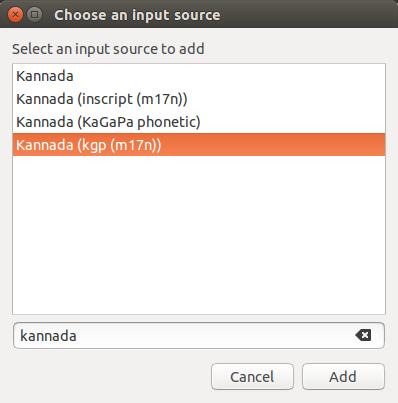
- Then, Click on +(Plus), select kannada(kgp(m17n)) click on add.
(Note : Also in this step you can add other languages to type)
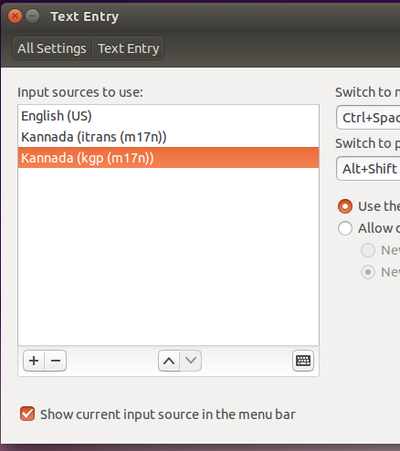
- Now, your select list look like this
- close all the windows and again logout from this window.
- In the login screen select Gnome classic (Metacity) and Login by using your ubuntu password.
- Now if you want to type kannada by using KGP(Nudi) press ctrl+space key.
How to install tar.gz file on Ubuntu
Open terminal(ctrl+alt+t)
1. The first step to install the file is to change the directory.
cd /Downloads/
2. extract the downloaded tar.gz file
sudo tar -zxvf <example.tar.gz>
3. Change the directory to unzipped folder, i.e.:
cd /download/example
./configure
make
4. And then get into the root i.e.:
sudo su
5. Enter your password.
make install
6. It will start to install.
Back to top
How to connect Datacards in ubuntu 14.04
This is by far the simplest way to configure a USB modem to connect to internet. No additional drivers or software are necessary.
- Plug your USB Modem into an USB port. The LED light starts blinking and in a while once your modem is recognized you will be able to see an option – New Mobile Broadband (CDMA) connection/New Mobile Broadband (GSM) connection on clicking the Network icon just besides the sound icon on top panel.
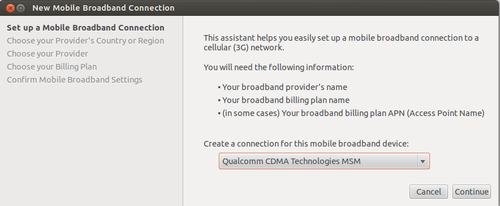
- Once you click that, you will see this screen which will show your device name. Click ‘Continue’ on the dialog.
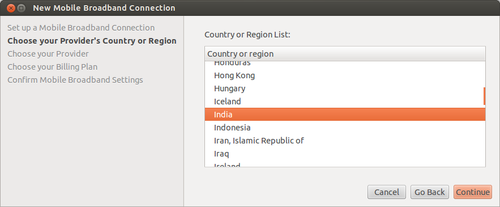
- In the next screen select country as ‘India’. This will help Ubuntu list Indian service providers in the next screen.
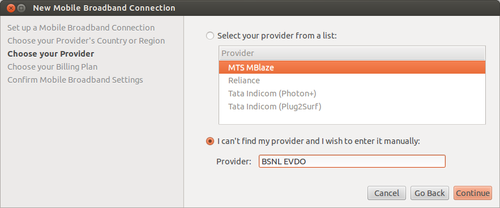
- In the ‘Choose your Provider’ screen select your service provider. In case it is not listed (BSNL EVDO is not listed) enter it manually in the space provided. In case of EDGE/GPRS/3G connection the service providers list will be long.
- The choose your billing plan screen appears only when using a EDGE/GPRS/3G connection. If you are configuring a 3G modem, say BSNL you will be required to select proper zone (Eg. OldSouthZoneA…) to use proper APN settings.
- The last screen is to confirm all the settings and apply them. Click Apply here.
- Connected and now you can browse.
How to connect a printer in ubuntu 14.04 ?
- Applications==>> System tools==>> system settings
- click on printer icon
- "Add" then Select you Printer name then Printer model in the next page and by clicking Add button to complete this process.
How to set up Hp printers through hplip?
- Download hplip from here
- Open a terminal(applications>> accessories>> terminal)
- Type sh hplip-3.14.6.run command/copy+paste in terminal press Enter
- If it asks for a password, please enter your Ubuntu login password
- then follow as it shows.
- Once it complete all the steps, follow the general printer setup steps.
How to connect Canon printers in Ubuntu
1.Click Here to Download the driver.
2. Right click on the downloaded .tar.gz folder and select "extract here" option.
3. Open the extracted folder(Linux_CAPT_PrinterDriver_V260_uk_EN)
4. Find the following folders
a. cndrvcups-common.deb
b. cndrvcups-capt.deb
5. then, double click on each file and click on the "install".
6. Once you done with installation then restart your computer.
7. Connect your printer goto system setting (applications>system tools >system setting).
8. Click on Printers> click add > in the list find your printer > click add.
Back to Top
