Difference between revisions of "Semicircle"
Jump to navigation
Jump to search
| Line 1: | Line 1: | ||
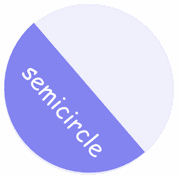
| − | Show children semicircle by drawing diameter.[[File:semicircle.gif|200px|right|link= | + | Show children semicircle by drawing diameter.[[File:semicircle.gif|200px|right|link=]] |
=== Objectives === | === Objectives === | ||
| Line 13: | Line 13: | ||
===Materials/ Resources needed=== | ===Materials/ Resources needed=== | ||
| + | Non digital: White paper, compass and colour pencils | ||
| + | |||
===Process (How to do the activity)=== | ===Process (How to do the activity)=== | ||
# Bring cut circles of different sizes. | # Bring cut circles of different sizes. | ||
Revision as of 14:43, 16 May 2019
Show children semicircle by drawing diameter.
Objectives
- A diameter divides the circle into two equal halves and each such half is a semicircle or hemicircle.
- Forming a semicircle by joining any two points on the circumference through its centre i.e. by drawing a diameter.
Estimated Time
10 minutes
Prerequisites/Instructions, prior preparations, if any
Circle and diameter should have been introduced.
Ask children the previous day to cut circles of given radius and bring.
Materials/ Resources needed
Non digital: White paper, compass and colour pencils
Process (How to do the activity)
- Bring cut circles of different sizes.
- Fold them into exact halves.
- Recognise semicircles. Let them colour each half with different colour.
- Identify the centre, circumference, diameter and semicircle of the circle.
- Fold circle into exact half.
- Draw diameter on folded line and colour each half with different colour.
- Evaluation
- Were the students able to draw and cut perfect circles?
- Was the folded line (diameter) passing through the center of circle?
- In how many different ways can you draw semicircles for a given circle?
