Difference between revisions of "Frequently asked question on ubuntu 12.04"
| Line 154: | Line 154: | ||
[[Image:two.png]] <br> | [[Image:two.png]] <br> | ||
<li>2.Click on Display. | <li>2.Click on Display. | ||
| − | [[Image: | + | [[Image:Three1.png | 300fx]] <br> |
<li>3. Check mark on Mirror display and click on Detect displayes and Apply. | <li>3. Check mark on Mirror display and click on Detect displayes and Apply. | ||
Revision as of 06:27, 28 October 2014
How do I install UBUNTU using something else option
Steps to follow after choosing something else option while installing Ubuntu:-
Step 1: When you chose something else and click on Continue, something like the following screen will show up:

In the above window, first ntfs partition is the Windoze native partition and second is the free space. In your case, if you don't see any free space, then you can create one by deleting free partition in your desired hard disk. You can make sure which hard disk you have selected under “Device for boot loader installation”. Your ubuntu bootloader will be installed in this hard disk drive.
Step 2: Now, after freeing up the required space, you can add partitions for root directory by clicking on “Add” in the above window.
The below screen will show up when you click on “Add”:

Now, select as shown in this picture by giving your desired space for ubuntu root directory. The “/” symbol always indicates the root directory in GNU/Linux systems.
Then click OK.
This will create a new partition for the root directory.
Step 2a: Now, again click on “Add” and create a swap area. This can be done by selecting swap in the drop down menu of “Use as:” in the above window.
Always the swap partition size should be the double of your RAM size. So if your RAM is 1GB then swap would be 2GB.
Then click OK.
Step 3: The above steps will result in the Install window as shown below:

Here it shows that /dev/sda1 is your Windoze partition. /dev/sda2 is your new root partition. And /dev/sda3 is your SWAP space.
Once you are happy with the changes you have made, click “Install now” and proceed to the next step.
From next step, it'll be usual installation which may show up “Where are you?” window to know the location and so on.
How do I setup Thin client in Phase-1 and phase-2 schools
Note:below mentioned setup is only for the server
1.Go to the right top panel, Left click on network icon,
select the Edit connection.

2.Click on the Wired tab. and there click on Edit button.


How do I install and switch to the GNOME-Classic desktop?
- To install the Classic desktop on your Ubuntu 12.04 machine, follow the steps below:
- Press Ctrl + Alt + T on your keyboard to open the Terminal.
- When the Terminal opens, type the commands below at the prompt, i.e. after the $ symbol.
- sudo apt-get install gnome-session-fallback
- Press Enter. Enter your password when prompted.
- Note: When you type, your password is not visible.
- Restart your system, and at the log in screen, click on the Ubuntu Greeter icon.

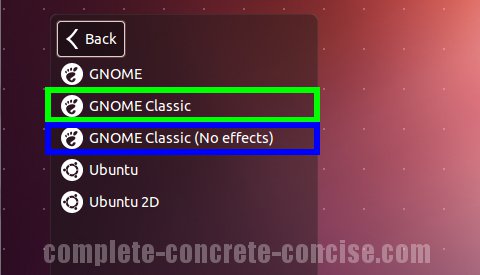
- Select the GNOME-Classic session and login. As shown below.
- This is only a one-time selection. You need not do this everytime you login.
- Your system will now start with Classic Desktop always!


How to setup kannada Ibus
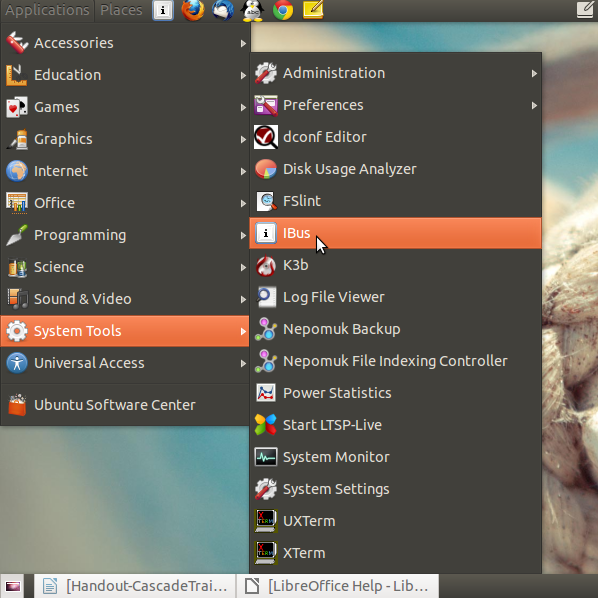
- 1. Click on applications > system tools > iBus
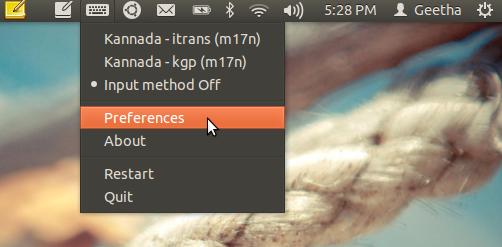
- 2.you will see a keyboard icon on the right side of the top panel

- 3. left click on keyboard icon > preference – iBus preference window will open
- 4. select input method
Note -check “that customise active input methods “ is selected
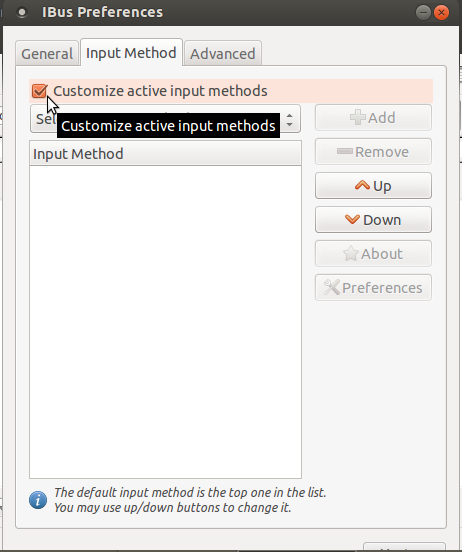
- 5.click on “ select input method “ - choose kannada from dropdown list > select kgp (if you prefer Nudi for kannada typing)


If you want Baraha select i-trans as option then go to “ select input method “ and follow the steps to get i–trans. Now both kgp and I-trans are available on your system. Back to Top
My LibreOffice crashes everytime I see print preview. What do I do?
- To not have LibreOffice crashing everytime you see the print preview, do the following steps:
- Open the Terminal (Application > Accessories > Terminal)
- At the prompt, type sudo apt-get autoremove lo-menubar
- Press Enter.
- Enter your password when prompted (password not visible).
How do I partition my hard disk manually to install Ubuntu 12.04?
How to use APF dvd's in Ubuntu
In APF cd/dvd's 9 dvd's are audio and video dvd's these can be play by right click and select open with VLC media player it will open up. For remaining 4 dvd's are the interactive games for that, please follow the below mentioned steps.
How to connect the Projector in Ubuntu
Basically we use 2 connections of Projector to connect, they are.
-
Projector Power cable connection is from socket to projector and VGA is from laptop/desktop to
- 1.In Computer go to Applications------>System tool-------->System Settings
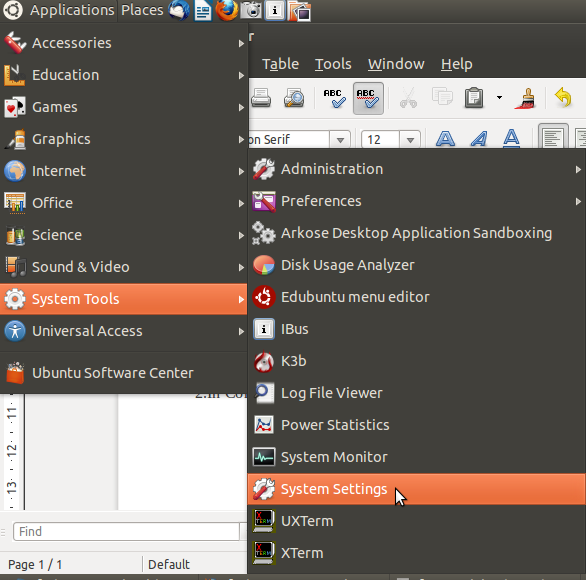
- 2.Click on Display.

- 3. Check mark on Mirror display and click on Detect displayes and Apply.
It will connects automatically.
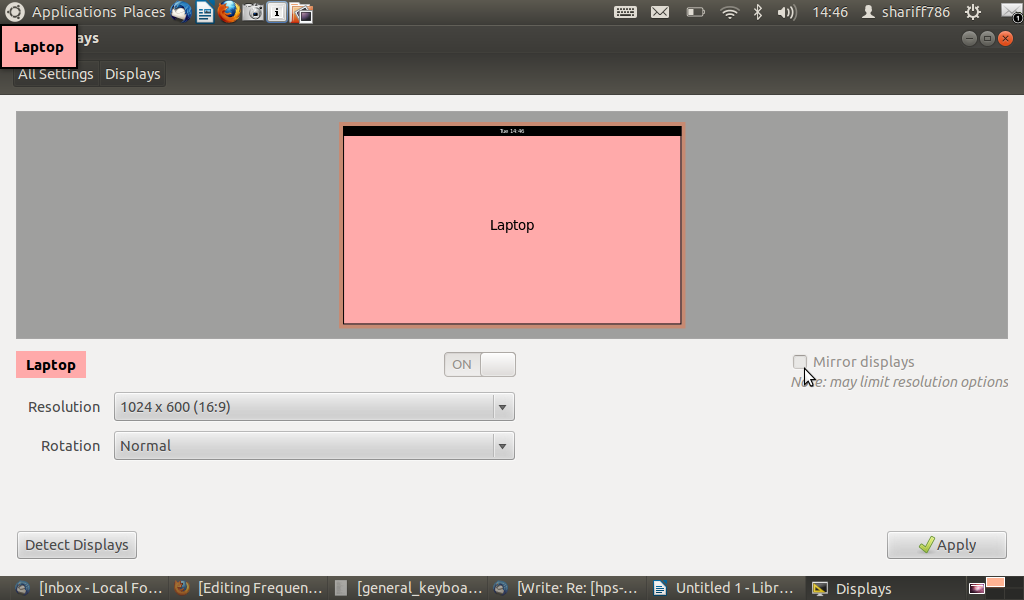
- (Note: After following the ablove steps if you are not able connect the projector then keeping projector ON state restart your laptop/Desktop.)
Back to top
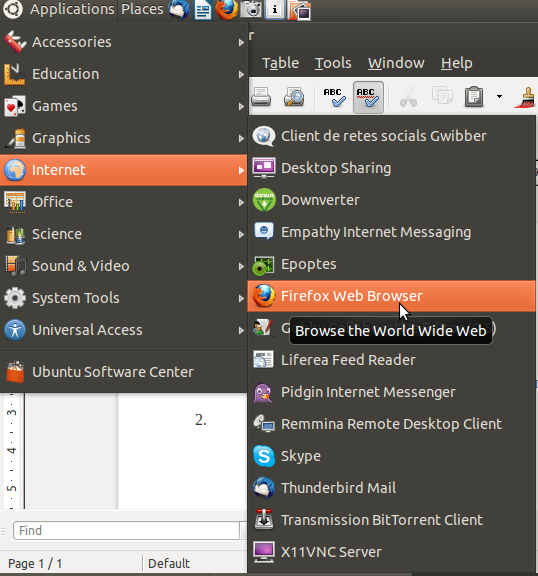
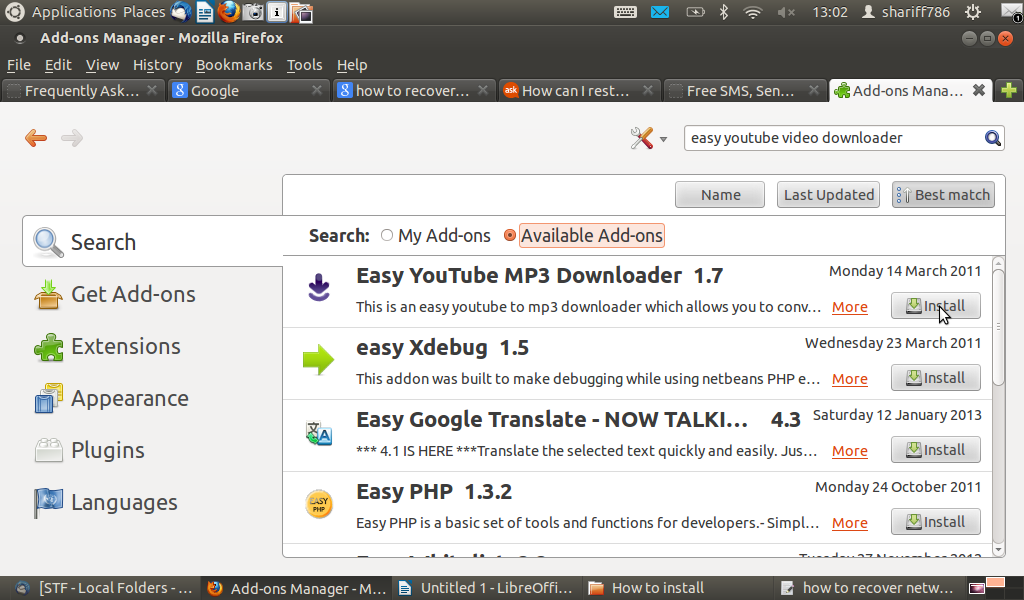
- 1.open the firefox for opening, Applications----->Internet------>Firefox Web Browser
- 2.In firefox web browser click on tools------>add-ons
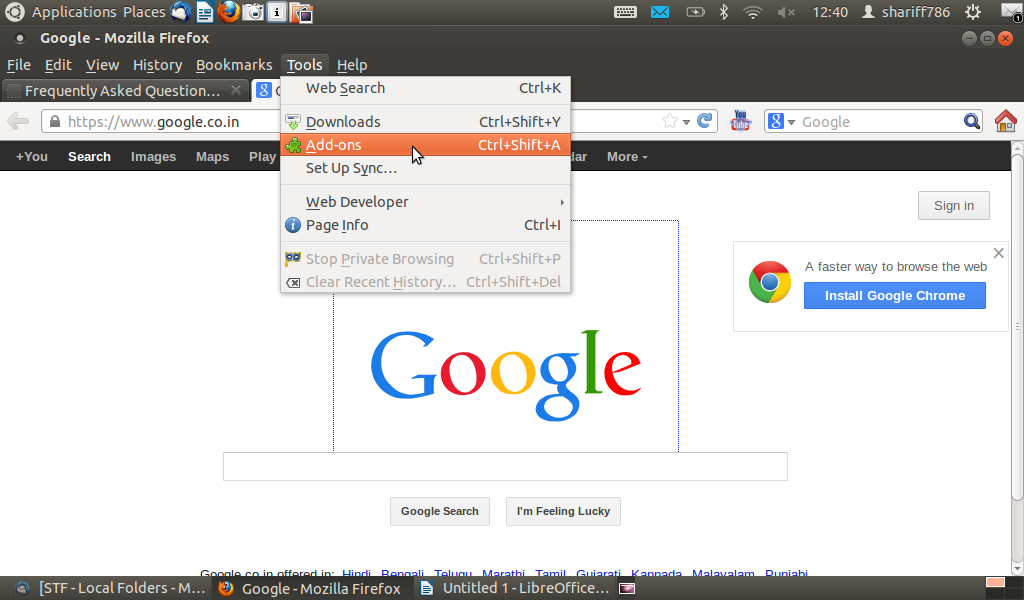
- 3.In top seearch box type as easy you tube video downloader press enter , you find the same add on in list click on install button and provide the passward.
After installation open any youtube video at the bottom of you tube video you will find the DOWNLOAD button. Click download button and save the video. Back to topHow do I launch PhET?
The customised DVD that you receive during your training sessions has PhET pre-installed on it. A shortcut or a launcher to PhET can be created as follows:
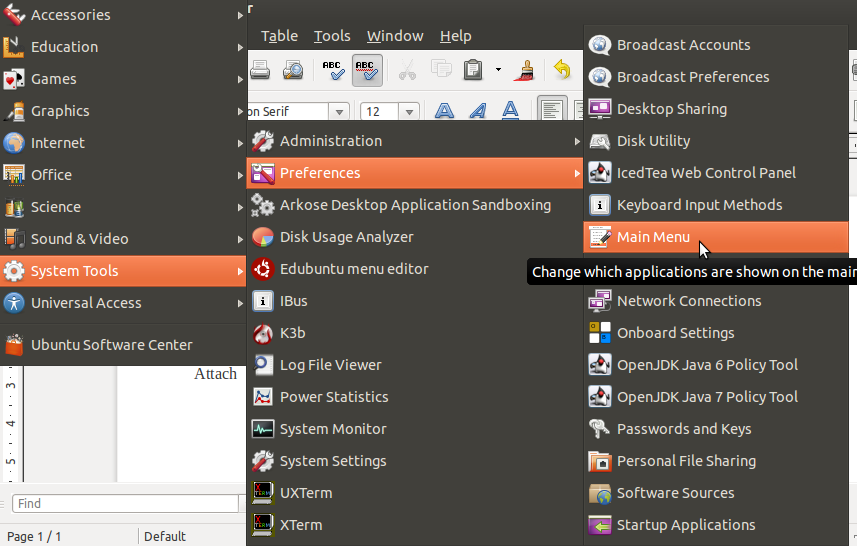
- 1. Applications----->System Tools------->Preferences------>Main menu
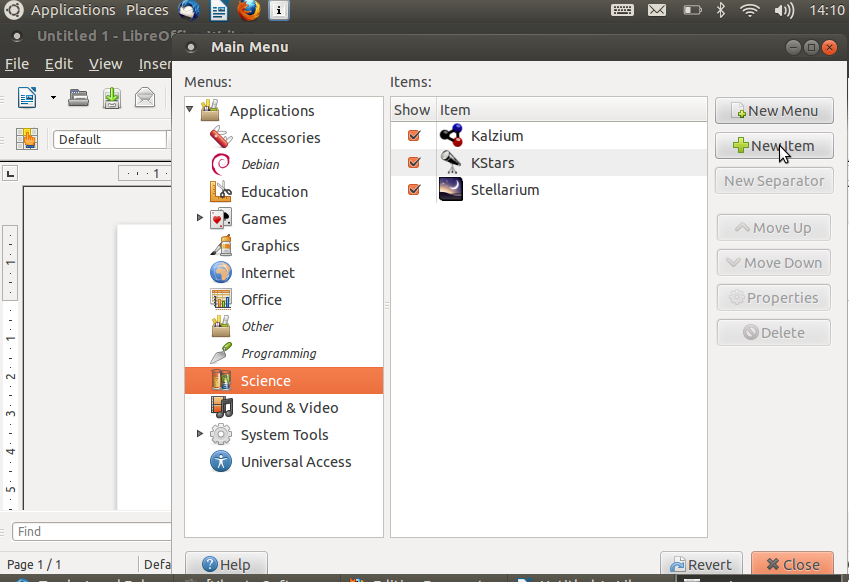
- 2.Select Science from menu, Click on +New Item
- 3.Type as mentioned below without any mistake.
- Name:PhET
- Command:firefox /opt/PhET/index.html
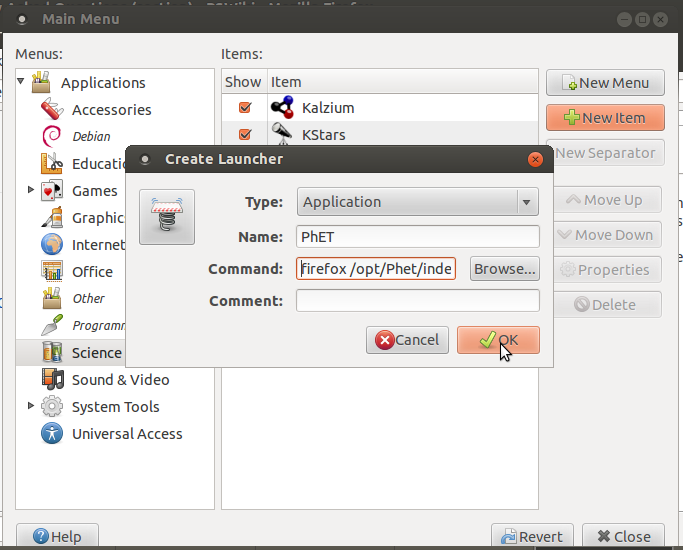
- 4.Click on OK and close all tabs
- 5.To open PhET, go as follows
Applications----->Science----->PhET
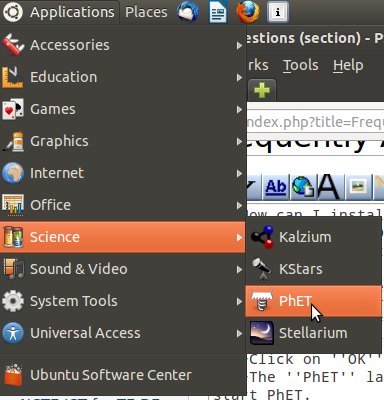
Back to top
How to download the youtube videos in ubuntu using firefox
Please follow the below mentioned steps
- 1.open the firefox for opening, Applications----->Internet------>Firefox Web Browser
Follow the steps to connect the projector


