Difference between revisions of "Kalpavriksha"
Jump to navigation
Jump to search
It will ask your system login password, just type and press Enter
| Line 53: | Line 53: | ||
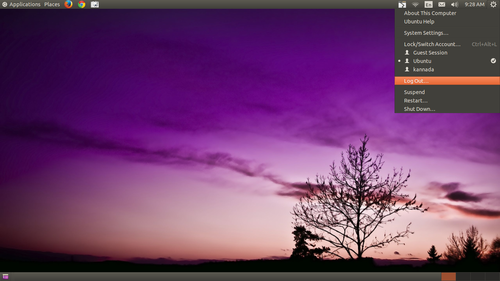
*Logout from the screen.<br> | *Logout from the screen.<br> | ||
| − | [[Image:ibus1.png | | + | [[Image:ibus1.png |500px]]<br> |
| − | [[Image:ibus2.png | | + | [[Image:ibus2.png |500px]]<br> |
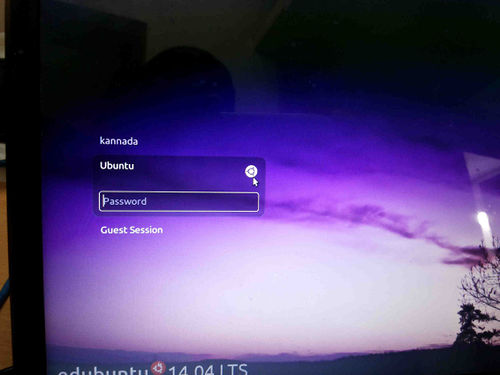
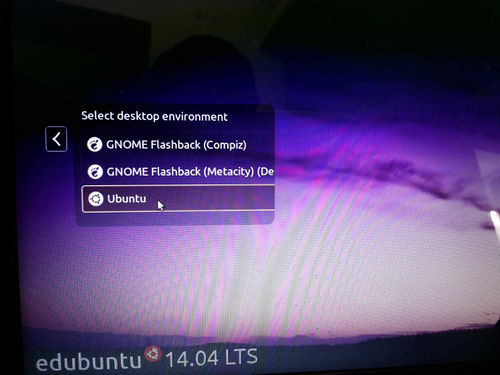
*from login screen Select Ubuntu like below screen.<br> | *from login screen Select Ubuntu like below screen.<br> | ||
| − | [[Image: logout1.jpg| | + | [[Image: logout1.jpg|500px]]<br> |
| − | [[Image: logout2.jpg| | + | [[Image: logout2.jpg|500px]]<br> |
*Again login to Ubuntu user by using your ubuntu password.<br> | *Again login to Ubuntu user by using your ubuntu password.<br> | ||
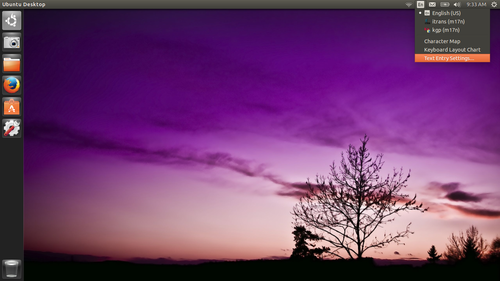
*On the top right side of the desktop, click on '''En''' icon(on top of the rightside screen) and goto text entry setting. | *On the top right side of the desktop, click on '''En''' icon(on top of the rightside screen) and goto text entry setting. | ||
| − | [[Image:ibus3.png | | + | [[Image:ibus3.png |500px]]<br> |
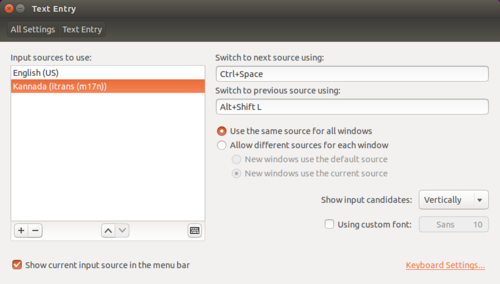
*In the text entry window, select Kannada (KaGaPa Phonetic) and click on – (Minus)symbol. | *In the text entry window, select Kannada (KaGaPa Phonetic) and click on – (Minus)symbol. | ||
| − | [[Image:ibus4.png | | + | [[Image:ibus4.png |500px]]<br> |
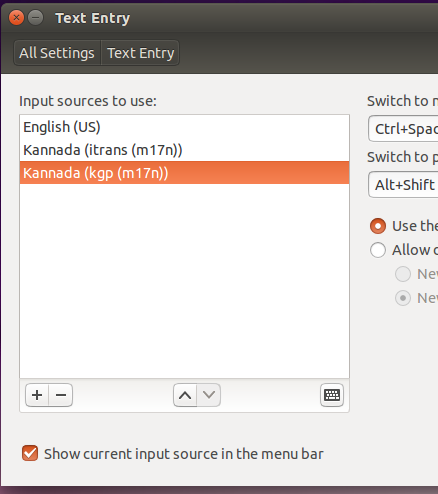
*Then, Click on +(Plus), select kannada(kgp(m17n)) click on add. | *Then, Click on +(Plus), select kannada(kgp(m17n)) click on add. | ||
(Note : Also in this step you can add other languages to type) | (Note : Also in this step you can add other languages to type) | ||
| − | [[Image:ibus5.png | | + | [[Image:ibus5.png |500px]]<br> |
* Now, your select list look like this | * Now, your select list look like this | ||
| − | [[Image:ibus6.png | | + | [[Image:ibus6.png |500px]] <br> |
*close all the windows and again logout from this window. | *close all the windows and again logout from this window. | ||
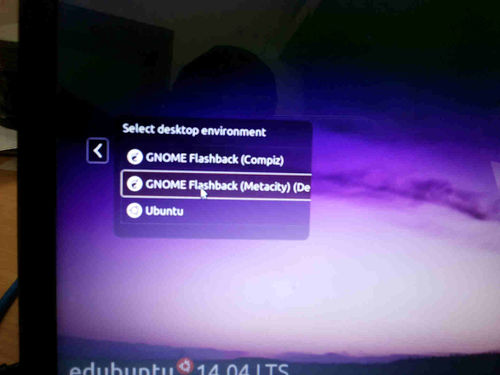
*In the login screen select Gnome classic (Metacity) and Login by using your ubuntu password. | *In the login screen select Gnome classic (Metacity) and Login by using your ubuntu password. | ||
| − | [[Image: login.jpg| | + | [[Image: login.jpg|500px]]<br> |
*Now if you want to type kannada by using KGP(Nudi) press ctrl+space key. | *Now if you want to type kannada by using KGP(Nudi) press ctrl+space key. | ||
[[#top|Back to Top]] | [[#top|Back to Top]] | ||
Revision as of 23:08, 1 December 2014
NOTE: Before following these below steps, take a backup of your existing data.
- Go to Places=>Home Folder
- In that select all the folders/files and copy to external devices(Like Pend drive, External hard disk).
Installing Ubuntu 14.04 (Kalpavriksha)
Installing Ubuntu 14.04 along side windows 7 or windows XP
Installing Ubuntu 14.04 alongside windows 8
Installing Ubuntu 14.04 alongside windows8
Upgrading from Ubuntu 12.04 to Ubuntu 14.04
Ubuntu Upgrad from 12.04 to 14.04 or Erase disk and install
Video on installation
For watching and downloading this video on youtube Click here
Download video
General Problems and Steps for after installing ubuntu 14.04
Repairing Grub/Repairing Ubuntu booting Problem(Grub)
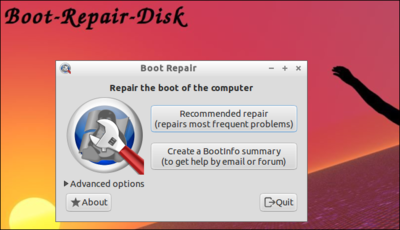
Boot-Repair is a simple tool to repair frequent boot issues you may encounter in Ubuntu like when you can't boot Ubuntu after installing Windows or another Linux distribution, or when you can't boot Windows after installing Ubuntu, or when GRUB is not displayed anymore, some upgrade breaks GRUB, etc.
1. If you are able to login in ubuntu, Follow the below steps:
- Login in to ubuntu Operating System
- goto to application==>>System tools==>>Administration==>>Boot repair

- Once the above window open, click on Recommended repair.
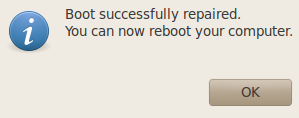
- Now, It will start to repaireing your groub(will take some minute to repair)

- Restart your computer after using the Boot Repair tool.
Adding new user account in ubuntu 14.04
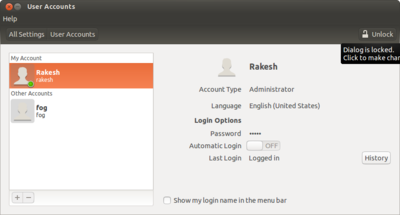
- Open system settings (Applications==>>System tools==>>System settings)
- click on User accounts.
- Click on Unlock button and put a login ubuntu password
- Click on Plus(+)symbol and fill the your name and new user account name.
- click Add.
- If you want the new user account in Kannada interface select new account you have created and click on langauage, select language kannada.
- Once you restart your computer, you will able to see two user accounts, select and login.
How to add languages in ibus in Ubuntu 14.04
- Logout from the screen.
- from login screen Select Ubuntu like below screen.
- Again login to Ubuntu user by using your ubuntu password.
- On the top right side of the desktop, click on En icon(on top of the rightside screen) and goto text entry setting.
- In the text entry window, select Kannada (KaGaPa Phonetic) and click on – (Minus)symbol.
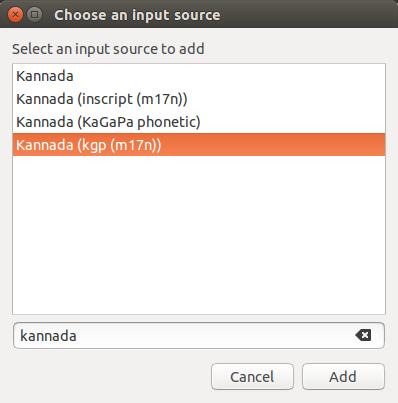
- Then, Click on +(Plus), select kannada(kgp(m17n)) click on add.
(Note : Also in this step you can add other languages to type)
- Now, your select list look like this
- close all the windows and again logout from this window.
- In the login screen select Gnome classic (Metacity) and Login by using your ubuntu password.
- Now if you want to type kannada by using KGP(Nudi) press ctrl+space key.
