Open Shot Video Editor manual
[to Download openshot Manual click here]
Openshot Video Editor
Creating Video using Images / Videos / Music
Step 1 – To open Openshot
Click on Application > Sound & Video > Openshot video editor
Step 2 – Import Photos & Music
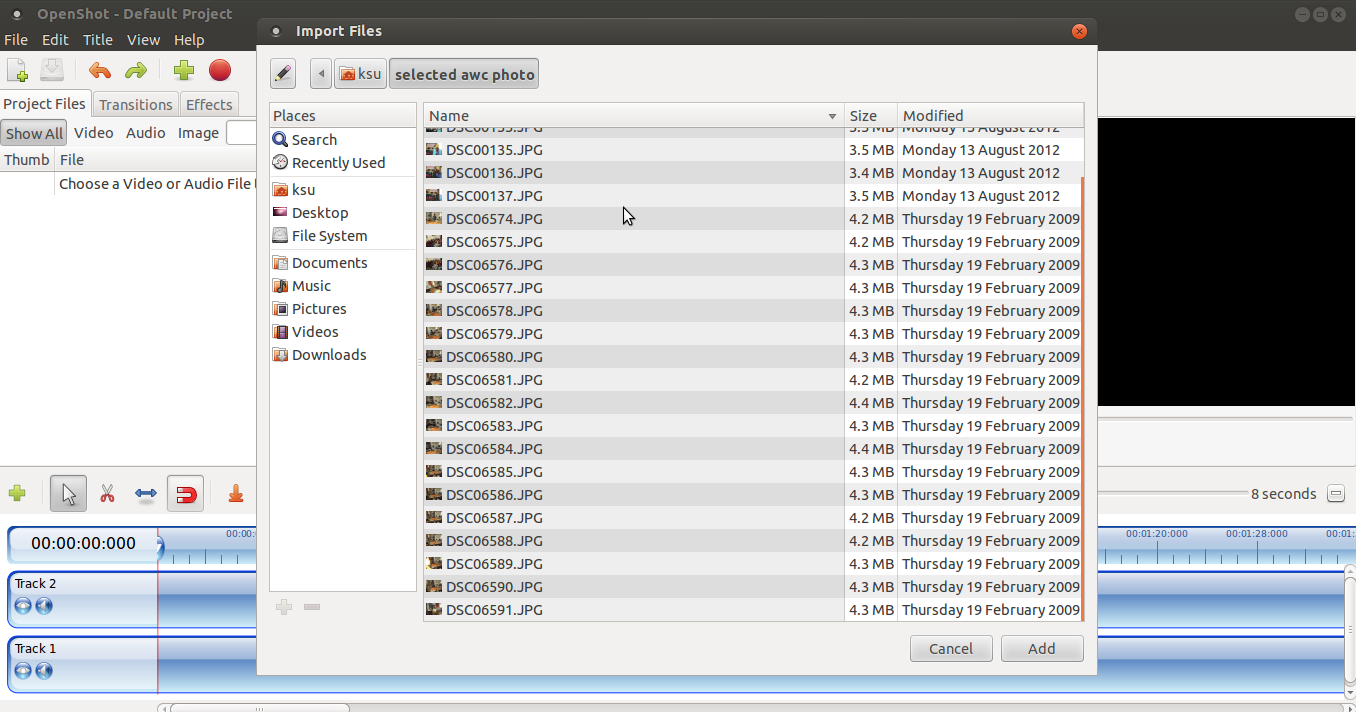
Click on “+” icon in the menu bar and select the photos and music you want and click OK.
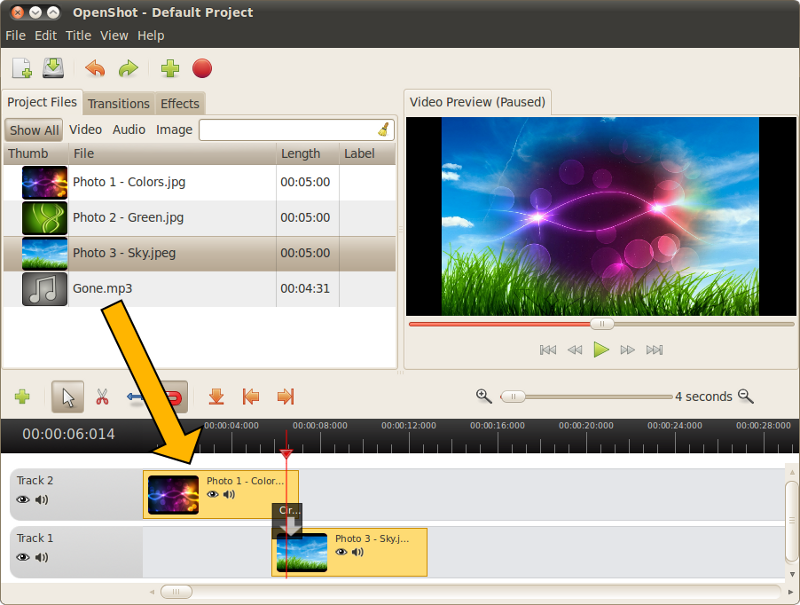
Step 3 – Arrange Photos on Timeline After you have imported some files, the next step is adding them to the timeline and arranging them. Click on each photo (one at a time), and drag them onto Track 2 on the timeline. Drag and drop the photos (also known as clips) to arrange them.
Step 4 – Add Music to Timeline To make our photo slide-show more interesting, we need to add some music. You should have imported a music file in step 1. Click on the music file, and drag it onto Track 1 on the timeline.
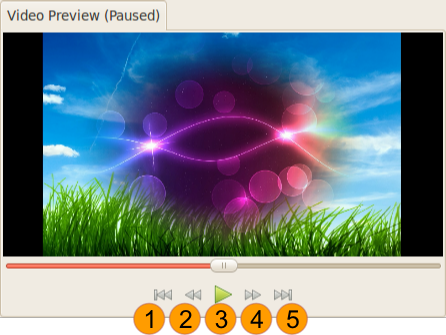
Step 5 – Preview your Project To preview what our video looks & sounds like, click the Play button under the preview window. Click the Play button again to pause your video. Remember, if you need to re-arrange any clips, just drag and drop the clips to move them.
Step 6 – Export your Video
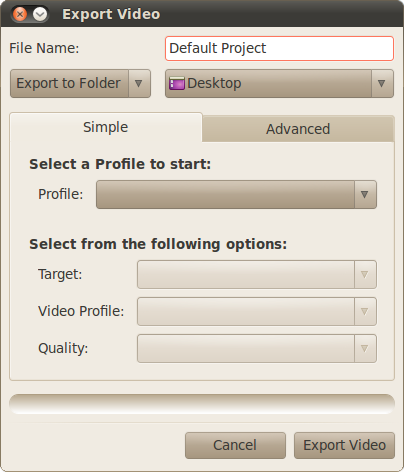
Once you are happy with your photo slide-show video, the next step is to export your video. This will convert your OpenShot project into a single video file, which should work on any Linux media player (such as Totem, VLC, etc...) or websites (such as YouTube, Vimeo, etc...). Click on the Export Video icon at the top of the screen (or use the File > Export Video... menu). Choose from one of the many preset export options, and click the Export Video button.
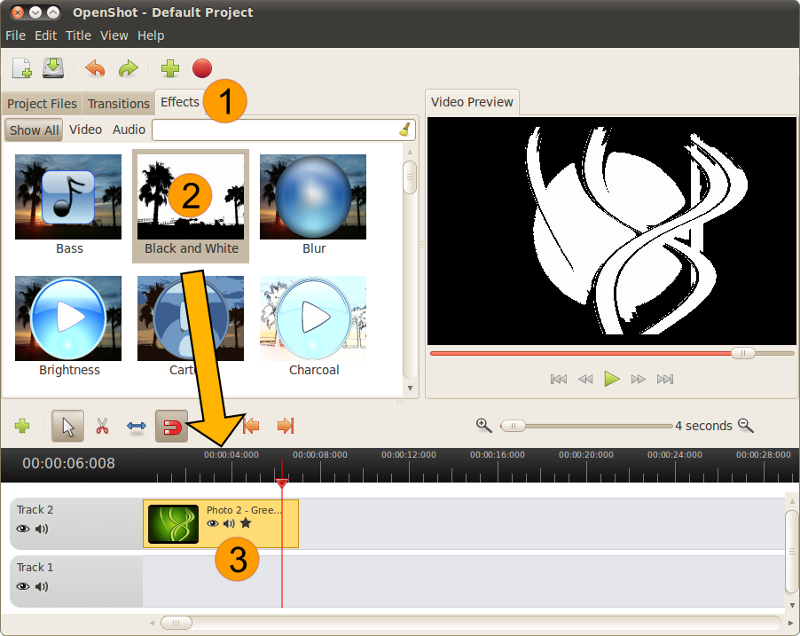
Add an Effect
To add an effect, switch to the Effects tab, select an effect from the list, and drag the effect onto a clip on the timeline.
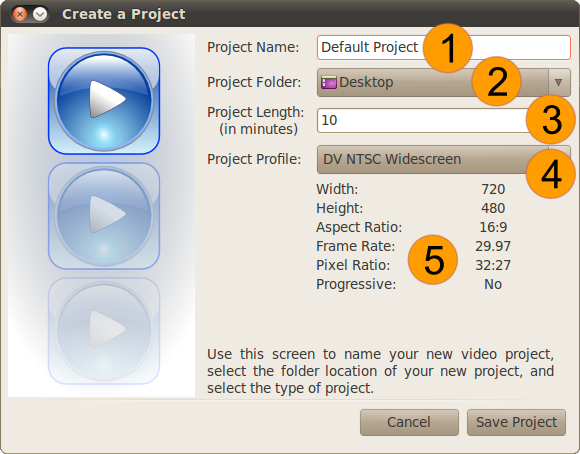
Save Project Screen Clicking New Project or Save Project will result in this screen being shown. Give your project name and save it for further editing.
For more tutorials on Openshot video editor [click here]
