Mail merge
Jump to navigation
Jump to search
What is Mail Merge?
→ Mail Merge is used to create multiple customized e-mail messages using data in a spreadsheet.
→ Mail merge is a general term for merging information from a database with a template message, which is sent to many recipients, so that each recipient gets a personalized message.
→ Mail merge does two things:
- It creates a separate message for each recipient, so that recipients do not see each other's e-mail addresses.
- It optionally personalizes the message using information from the database, so that each recipient gets a slightly different message.
Setup
- In a web browser, go to the Mail Merge Installation Page and click "Download Now."
- Once the file is downloaded, start Thunderbird, pull down your Tools menu and select "Add-ons."
- In the "Get Add-ons" tab, click the "Install" button (on the bottom left of the dialog box).
- Find the .xpi file you downloaded and click "Open".
- When prompted, click the "Restart Thunderbird" button.
Now the extension is set, and the user can do a mail merge message any time.
Create a Spreadsheet
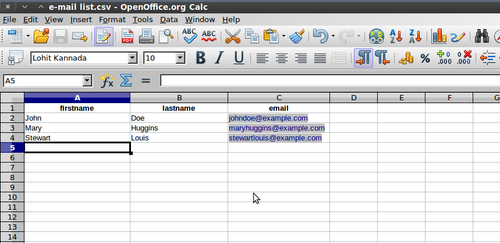
- Create an OpenOffice Spreadsheet with the data you want in the message, including the full e-mail address.
- Make sure there is a header row with names for all columns:
- these names must not contain spaces.
- (The file should look something like this snapshot shown below)
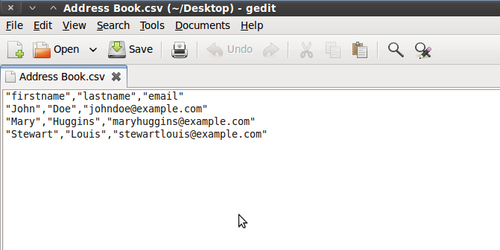
- Save the spreadsheet as a Text CSV (.csv). If you closed your spreadsheet and viewed this file in a text editor, it would look like the snapshot given below:
Send a Mail Merge Message
In Thunderbird
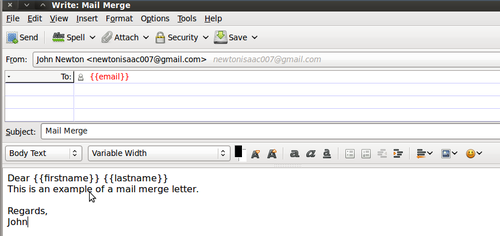
- Start a new message. Any parts of the spreadsheet that you would like to include in your message must be enclosed in 2 sets of curly braces {{ }}.
- In the
- To: field, put the column name you chose for the email address surrounded by 2 sets of curly braces: Template:Columnname.
- Add a subject.
- Draft the body of the message, enclosing the column headings for any parts of the spreadsheet that you would like to include in 2 sets of curly braces: {{ }}
Using the example spreadsheet created above, you message would resemble this snapshot shown below.
- Pull down the "File" menu and select "Mail Merge".
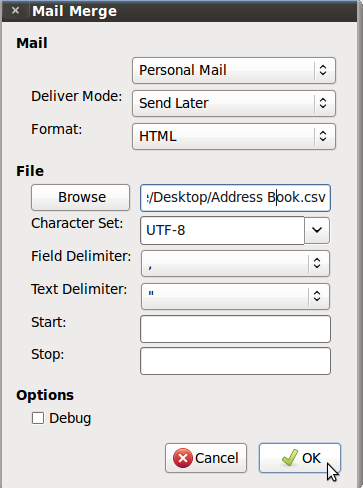
- A small dialog box should pop up.
- Under the Mail option, select Personal Mail
- There are 3 options in Deliver Mode:
- Send Later
- Save as Draft
- Send Now
Select your choice.
- Under the File option, Browse and select your .csv file.
- Keep the defaults for the rest of the options.
- (Using the example above, the dialog box should look something like this snapshot shown below) Click "OK" to complete the process.
- The message should disappear. Still in Thunderbird, click the plus sign next to your "Local Folders" and an folder called "Outbox" should have some new messages in it (one for each email address on your spreadsheet as in the snapshot shown below).
- Note: If you have selected Send Now in the Deliver Mode option, your message will be sent immediately.
- Only if you have selected Send Later, your messages will be saved in the Outbox.
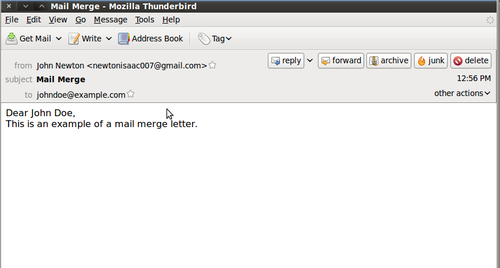
- When you open one of these messages, you should see the fields from the spreadsheet filled out. (Sample snapshot shown below). When you are ready to send them, pull down the "File" menu and select "Send Unsent Messages".
