Difference between revisions of "About Thunderbird"
m (added Category:Digital literacy using HotCat) |
|||
| Line 136: | Line 136: | ||
<br> | <br> | ||
Now, Your attachments(.odt, .ods or .odp files) will open with Libre office.<br> | Now, Your attachments(.odt, .ods or .odp files) will open with Libre office.<br> | ||
| + | |||
| + | [[Category:Digital literacy]] | ||
Latest revision as of 17:57, 30 May 2022
Thunderbird
Thunderbird is a free, open-source, cross-platform application for managing email and news feeds. It is a local (rather than a web-based) email application that is powerful yet easy-to-use.
It supports different mail accounts (POP, IMAP, GMail), has an integrated learning Spam filter, and offers easy organization of mails with tagging and virtual folders. Also, more features can be added by installing extensions.
How to install?
- To install Thunderbird, simply type the following in terminal(ctrl+Alt+T):
sudo apt-get install thunderbird
- For a better integration in the Gnome environment, you may also wish to install the following package: thunderbird-gnome-support. Or type the following at the teminal:
sudo apt-get install thunderbird-gnome-support
Setting up your mail
- To add a new mail account in Thunderbird, follow the steps:When you open Thunderbird for the first time you need to create a mail account (your existing e-mail account).
Go to File → New → Mail Account.
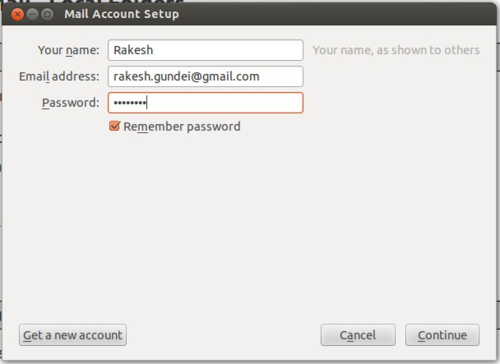
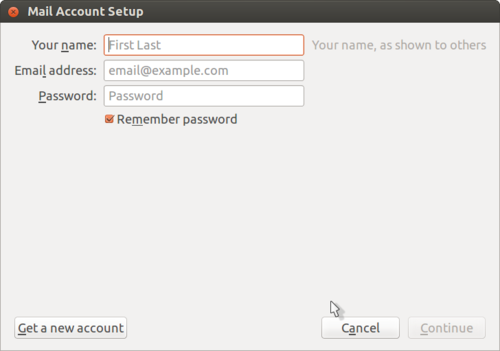
The Mail Account Setup box will appear and you need to enter your details (User name, password, e-mail ID etc) as shown:
- Click Continue after you enter your details. The server starts verifying the details to setup setup your account.
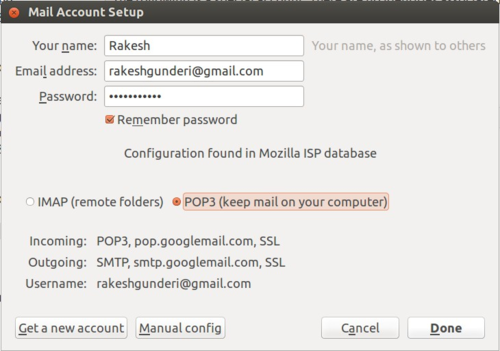
- Select POP3 account type then click continue.
- Once the details are verified, click Create Account.
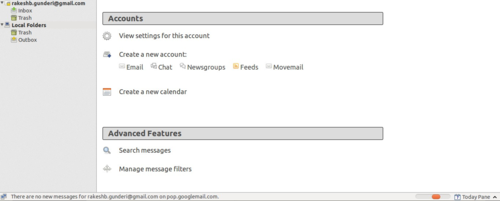
- Your account is now created and Thunderbird downloads your messages from the server.
Setting up your gmail account in Thunderbird
- Handout for Gmail account configuration in Thunderbird Click here
- Handout for mails filtering in Thunderbird Click her
Gmail account configuration in Thunderbird
Emails as a learning resource
These days many people manage their email on the web using services such as Gmail or Hotmail. These services offer access to email accounts through any web browser.
Another way to handle your email is to use an email client program like Thunderbird installed on your own computer. A program like this offers many advantages over using a web email client. It lets you organize your email exactly how you want, it enables you to check email when you are not connected to the Internet, and you can manage multiple email accounts in one place.
Checking Gmail on the web – can be a 'godown' experience
Learn Thunderbird – an email 'client' to make it a Library
Mozilla Thunderbird is a feature-rich, reliable, and secure tool for managing your email. It's free and open source software.
Before going to thunderbird you should follow below two steps in gmail.
1. FIRST STEP:-
Sign in to Gmail.
- Click the gear in the top right
 .
. - Select Settings.
- Click Forwarding and POP/IMAP.
- Select Enable POP for all mail or Enable POP for mail that arrives from now on.
- Choose what to do with your messages after your POP client or device receives them.
- Click Save Changes, as shown in the below link.
2. SECOND STEP:-
- Click the gear in the top right

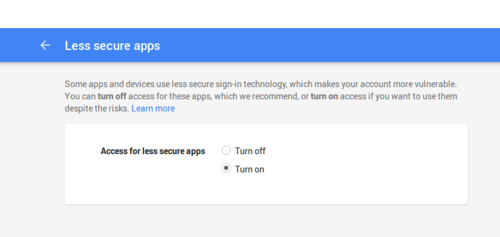
- Click on Account and then scroll down to signing in and select Access for less secure apps .
- Turn on as showing below.
Then Logout from your gmail account.
Now, its time to configure Thunderbird.
Open Thunderbird by clicking: -
Applications – Internet – Thunderbird
Here's how to work your way through the automated setup process:
- Make sure that your computer is connected to the Internet and then start Thunderbird.
- On the first setup screen, enter your name, your email address, your password. Your password is your current email password. If you want Thunderbird to remember your password (so you don't need to keep typing it every time you check your mail), click the Remember password checkbox.
- Click the Continue button to go to the next step.
- Thunderbird tries to get your account settings by connecting to the database of Internet Service Providers (ISPs) that is maintained by Mozilla.
If Thunderbird finds the information for your email provider it automatically enters that information for you. Click the Create Account button to add the account. Click the Cancel button to stop the set up process.
- Once your account is created, Thunderbird asks you if you want it to be the default application for email, newsgroups, or feeds. Make your choices by clicking the checkboxes.
Your account has been created and you're ready to go!
Repeat this process for as many accounts as you want to add to Thunderbird.
For more details on configure :- https://support.google.com/mail/troubleshooter/1668960?hl=en&rd=1
mail Filters
Handout for mails filtering in Thunderbird Click her
Filters help you place your incoming mail in different folders so that you're not overwhelmed by a large number of messages in your inbox. Filters can also perform a number of other actions like marking messages as read, or forwarding messages to another email address.
One way to use a filter is to move messages to a certain folder. For example, if you receive many emails from TOER and you do not want to see them pile up in your inbox, set up a filter that moves your messages from the inbox to a folder called "TOER".
Setting up a filter
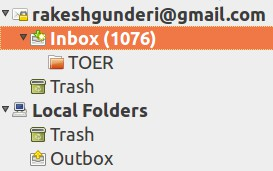
- Right click on the inbox and click on new folder.
- Name the folder whatever you like. For example, name the folder "TOER".
- Click Create Folder. Your new folder will show up in the Folders pane.
- Go to the Tools menu and click Message Filters.
- Click New to open the dialog box for setting up a filter.
- Name the filter whatever you like. Following the example, call it "TOER filter".
Then, select an option from the drop-down menu - for example, To contain. This is where you can choose what type of filter you want. Filter any messages comes to tsmathsscienceupstf@googlegroups.com ID You can click the plus symbol to add more filters and also you can filter subject wise.

- On the same dialog box, click the drop down menu next to Move Message To and select a folder. This is where you would go to Local Folders and find the folder you created. Following the example, select the "TOER" folder.
- Click the OK button and your filter is ready to go!
- To test your filter, click the Run Now button in the "Message Filters" dialog box. Make sure Inbox is selected to the left of this button.
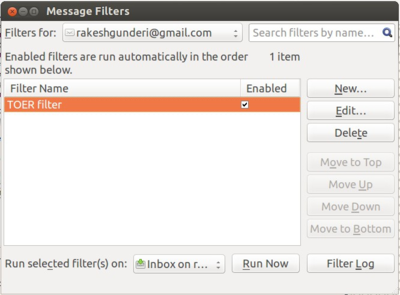
- Check the new folder you created to confirm that messages from your inbox were moved based on your filter.
FQA
1. If Thunderbird attachments(.odt, .ods or .odp files) are not opening with Libre office writer then follow the step to set up Libreoffice to open it.
>> Click on the mail attachment files
>> select "open with"
>> click on the drop-down menu.
>> Select "other options"
>> in browse menu, click on the " Filesystem" or "Computer"
>> then " usr >> Bin >> here select "Libreoffice" from the list and click on "Open".
Now, Your attachments(.odt, .ods or .odp files) will open with Libre office.

